return to top
Quick Start Guide Version 2.0
TABLE OF CONTENTS
- 1. BROWSER – IMPORTANT INFORMATION
- 2. DEFINITIONS
- 3. INTRODUCTION
- 4. LAUNCHING SCRIPTSURE
- 5. LOGIN WINDOW
- 6. LOGOUT
- 7. NAVIGATING SCRIPTSURE - TOOLBAR
- 8. ADD A NEW PATIENT
- 9. FINDING A PATIENT
- 10. OPEN A PATIENT CHART
- 11. FINDING A MEDICATION
- 12. SELECTING A MEDICATION TO PRESCRIBE
- 13. PRESCRIPTION PREVIEW SCREEN
- 14. SENDING A PRESCRIPTION ELECTRONICALLY TO A PHARMACY
- 15. CREATE A FAVORITE MEDICATION LIST
- 16. STORING A NEW FORMAT
1. BROWSER – IMPORTANT INFORMATION
The preferred browser is Google Chrome for stability and security. ScriptSure was specifically designed using Material Design, which is a Google code set. Google Chrome can be downloaded here: https://www.google.com/chrome/. Scriptsure is not compatible with Internet Explorer (IE) as Microsoft no longer provides security updates or technical support for IE. Google Chrome, Apples Safari and FireFox compatible, but Google Chrome and Apple Safari are the preferred browser choices. (Edge is also not a compatible browser).
2. DEFINITIONS
- Electronic prescription: an electronic prescription message sent, for either a new or refill medication, directly to a pharmacy. These message are sent over the secure SureScripts network.
- SIG: the instructions for a prescription.
- Refills: the number of refills indicated on a prescription (for pharmacy use).
- Refill Request: An electronic message received from a pharmacy requesting a refill or update to a prescription.
- Eligibility: information related to a patient’s prescription drug benefit coverage.
- Formulary: indicated the coverage for a medication under a patient’s insurance or health plan
- Drug History Download (medication history): list of medications that a patient has been prescribed in the previous 18 months. ScriptSure shows this information, which may be incomplete, from the patient’s health plan, PBM, or pharmacy. (Do not rely on this list as a complete list; always verify with the patient).
3. INTRODUCTION
Welcome to the ScriptSure Cloud ERX application. This document is designed to provide a brief introduction on the use of the application – it is not a comprehensive feature explanation. A full help menu is available here: Help Menu. There are two types of users of this application. Those that use ScriptSure as a stand-alone and those that use the application as a module integrated into their EHR system. Slight variations in launch, login to the application and screen views exist depending on which type of user you are.
4. LAUNCHING SCRIPTSURE
To begin using the application, navigate to www.ScriptSure.com and click the login link at the top right, or go to this site: https://us.scriptsure.com/#/login. If your ScriptSure Cloud ERX application is provided to you by your EHR, simply click the prescribe or launch ScriptSure button in the EHR and the automatic Single Sign-On process will both launch ScriptSure and log you in.
5. LOGIN WINDOW
To login, each user must enter a User Name and password, unless your EHR system launches and accesses ScriptSure directly, in which case you are enrolled in single sign-on and do not have to enter this information on each login to the application. This username and login is provided by your system administrator or EHR system. Your username is always an E-Mail address.

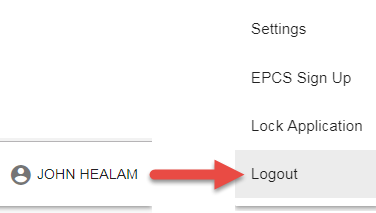
6. LOGOUT
To logout of the application, you can either close the browser window or click your username that appears in the top right of the application and then click Logout:
7. NAVIGATING SCRIPTSURE - TOOLBAR
Appearing at the top left and extending to the right there is an informational and navigation toolbar. Below are three examples of this toolbar. Depending on the device you are using (desktop, laptop, touchscreen, iPad, smartphone, etc.) and your screen resolution, you may see one of the following toolbars. Each does the same thing, just appear differently.
Full resolution view:

Mid-resolution view:

Hand-held resolution view:

From left to right, the toolbar shows the following:
- Current practice – selected practice puts the name, address and contact information for the currently selected practice on the prescriptions and stores that for history.
- urrent prescriber selected for prescription writing (this can different from the logged in user, if the logged in user has permissions to create non-controlled prescriptions for a provider).
- Home screen button – navigated user back to Home screen in the application from any screen.
- Scheduler button – navigates user to scheduler list.
- Messages button – navigates user to messages window to handle new prescriptions, refills, electronic Prior Authorization (ePA) messages and to view history or approved and declined prescription related messages for the practice.
- Reports button – navigates user to the reports window where reports and metrics can be run for the practice, user or patient.
- Queue button – opens a drop down of all medications that have been queued, but not yet sent across the entire practice. This button does not appear if there are no items in the queue.
8. ADD A NEW PATIENT
![]() Click the
Click the  button on the toolbar at the top of the screen.
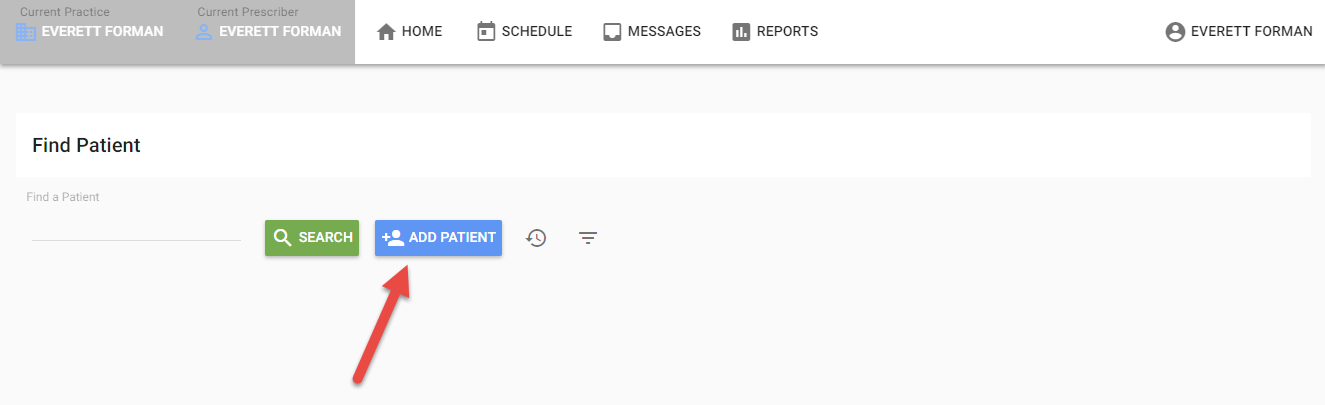
![]() To add a new patient to ScriptSure, click the
To add a new patient to ScriptSure, click the  button on the Home Screen:
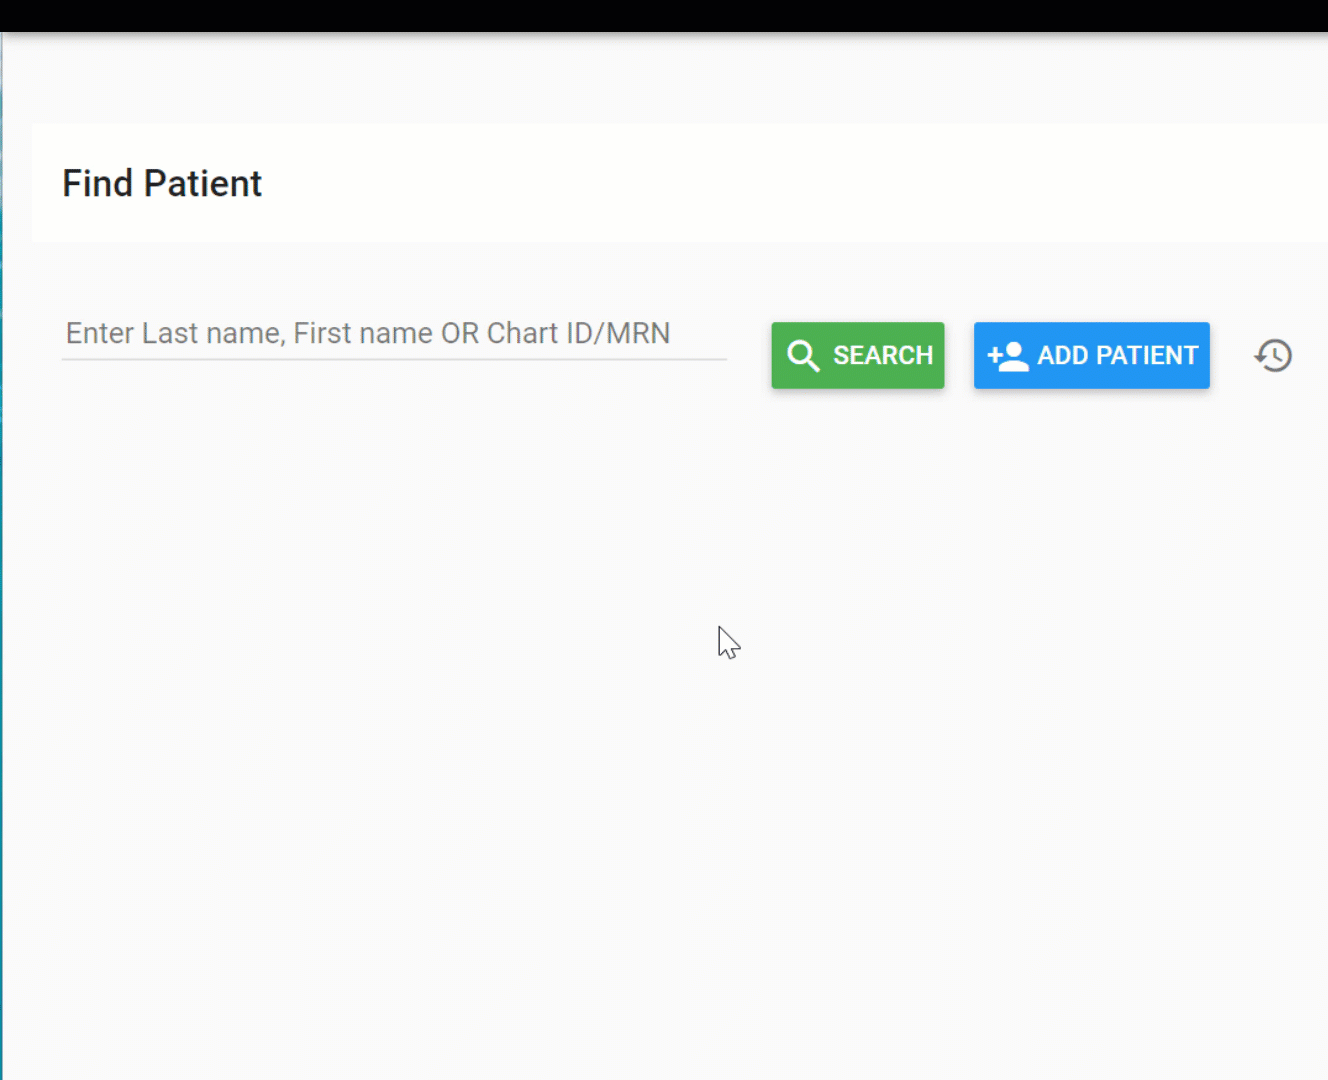
![]() The Add Patient Window will open, allowing you to enter the new patient’s information in the fields. Note: Several fields are required to create prescriptions; first name, last name, DOB, gender, ZIP, address and atleast one phone number (cell, home or work). Click Save when complete.
The Add Patient Window will open, allowing you to enter the new patient’s information in the fields. Note: Several fields are required to create prescriptions; first name, last name, DOB, gender, ZIP, address and atleast one phone number (cell, home or work). Click Save when complete.

Test Example:
9. FINDING A PATIENT
![]() To retrieve a patient record, begin at the Home (patient search screen). If you are not currently at the Home screen, click
To retrieve a patient record, begin at the Home (patient search screen). If you are not currently at the Home screen, click  at the top of the screen. In the search box (see red arrow below) you can type a patient’s last name and click
  to locate that patient.

![]() Patient’s that match the name entered will appear in the results area. Select the desired patient by double-left clicking on the patient row. In the example below, the search is for Patient, John
Patient’s that match the name entered will appear in the results area. Select the desired patient by double-left clicking on the patient row. In the example below, the search is for Patient, John

NOTE: The ![]() icon next to the add patient button gives you recently selected patient history.
icon next to the add patient button gives you recently selected patient history.
Additional Search options: There is an Advanced Search button next to the search box. Click to expand it and you will see other fields to help you locate a patient.


10. OPEN A PATIENT CHART
![]() Select a patient from the Home Screen
Select a patient from the Home Screen .
.
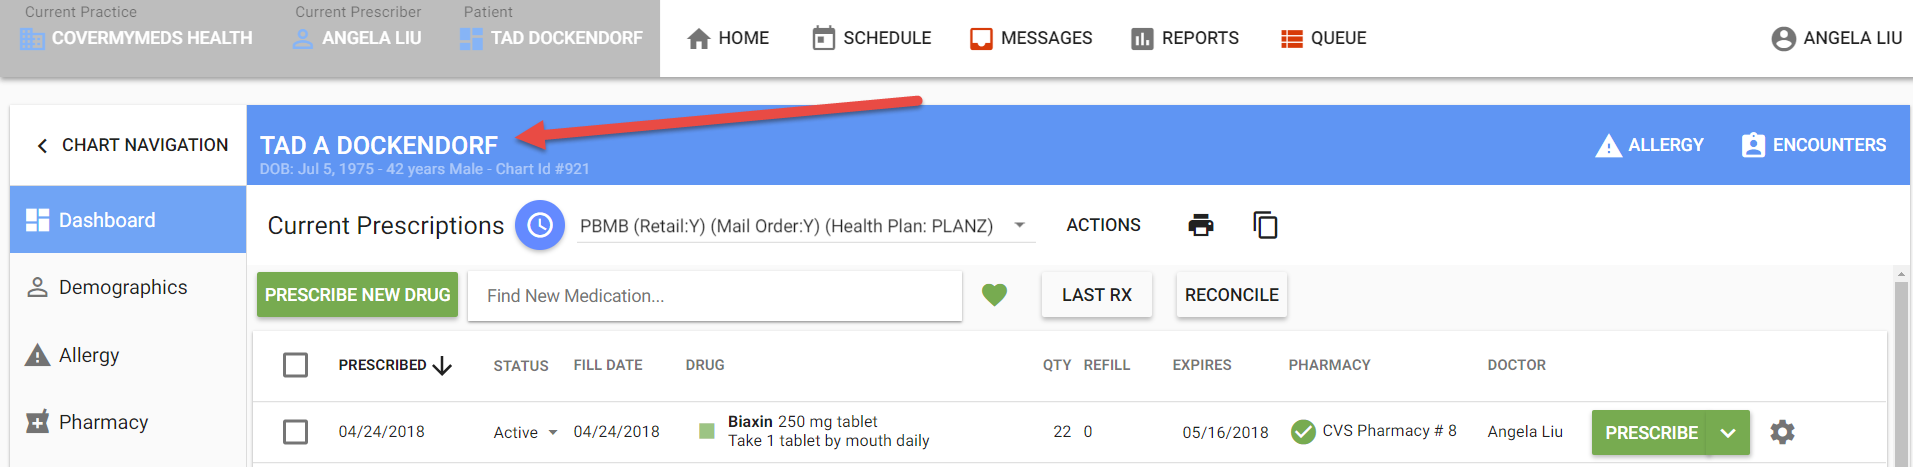
![]() When the patient is selected, the screen will change to the selected patients chart. You will have 2 indicators showing what patient you are working on and have currently selected. The top toolbar will show the selected patient (Tad Dockendorf is the patient in this example):
When the patient is selected, the screen will change to the selected patients chart. You will have 2 indicators showing what patient you are working on and have currently selected. The top toolbar will show the selected patient (Tad Dockendorf is the patient in this example):

Also, there is a patient banner that will show the selected patient:
Click through the tabs at left side of the window to view areas of patient chart. After the Patient Chart has opened, you can enter and view dashboard, prescriptions, demographics, allergies, pharmacies, etc.
![]() The Patient Chart (show below) will open initially to the Dashboard which shows the Last 6 Months of Prescriptions; (downloaded medication history for the patient appears below this medication table when available
The Patient Chart (show below) will open initially to the Dashboard which shows the Last 6 Months of Prescriptions; (downloaded medication history for the patient appears below this medication table when available
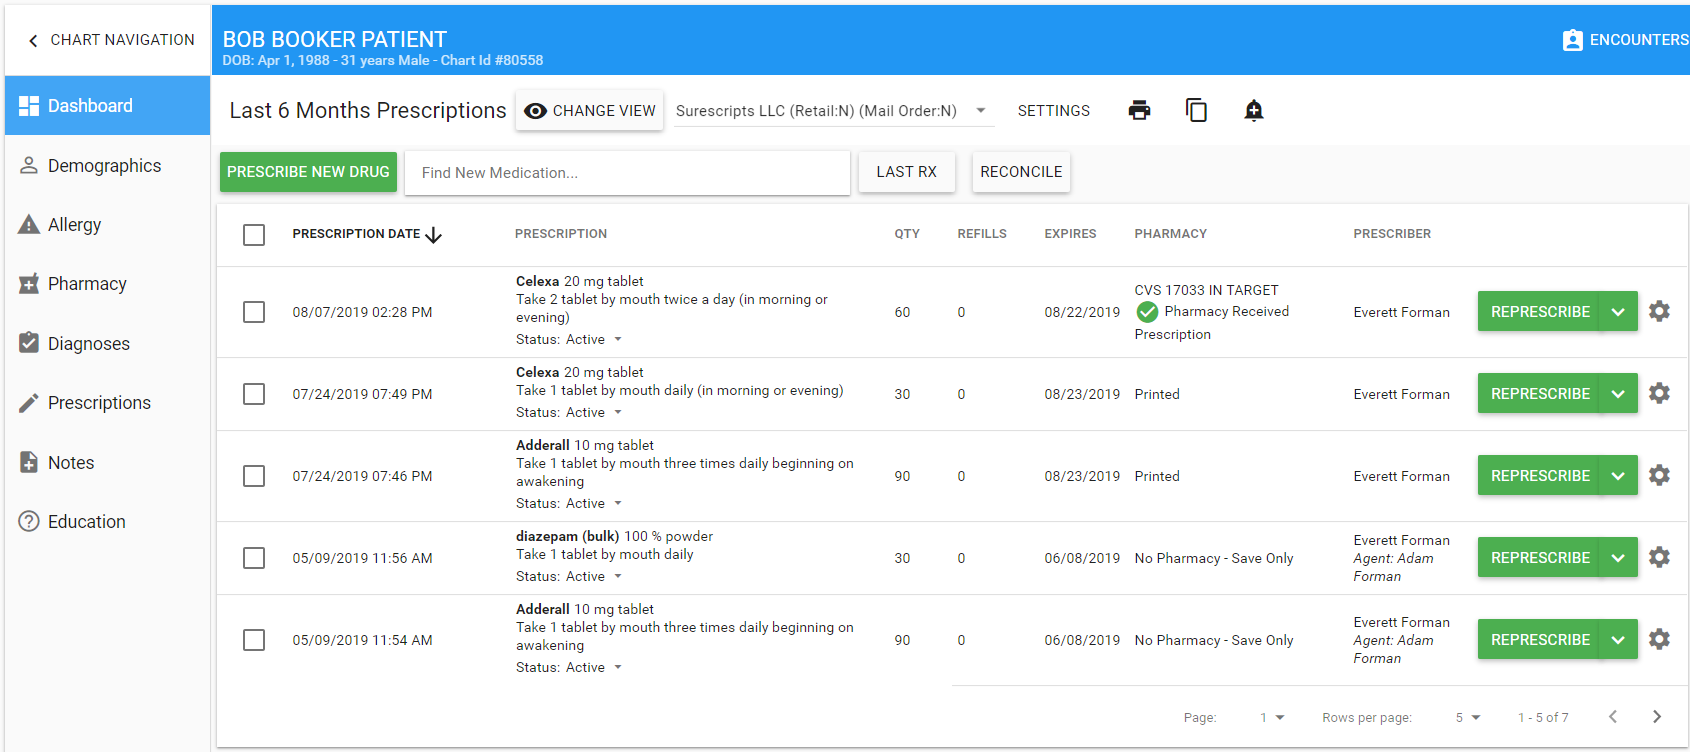
TIP: You can re-prescribe a medication from history by clicking  at the end of the medication row. Clicking the down-arrow next to the prescribe button will reveal two additional prescribe features that. The first is Add to Queue and the second is Show Confirmation.

- Add to Queue – this selects the medication to re-prescribe it and immediately places the script in the queue to send later with the same information visible on the row.
- Show Confirmation – this selects the medication to re-prescribe and places the user at the confirmation window (last step before sending to the pharmacy) bypassing the PREVIEW window which allows a user to make alterations to the medication. This is a useful shortcut if there are no changes to drug number, SIG or pharmacy selected.
- Click the
 view button to change the medication view to one of the available views:

- Click to Prescribe a new drug:

- View past medications prescribed for the patient here. You can re-prescribe a medication in the same format as delivered previously by clicking on the PRESCRIBE button.
- Here you can view the medications for this patient that were prescribed by other providers. (A license is required for this data.) This data is retrieved from pharmacies and PBM companies that store past prescription data. This Drug History Download information can be helpful in determining what the patient has taken or is currently taking. Please note that this download list may not represent all medications the patient has been prescribed and includes up to 12 months of data. DISCLAIMER: Certain information may not be available or accurate in this report including items that the patient asked not be disclosed due to patient privacy concerns, over-the-counter medications, low cost prescriptions, prescriptions paid for by the patient, or non-participating sources, or errors in insurance claims information. The provider should independently verify medication history with the patient.
11. FINDING A MEDICATION
There are multiple ways to find a medication. After selecting a patient, you can find a medication to prescribe by using one of the following:

![]() PRESCRIBE NEW DRUG BUTTON changes the screen to the find a drug search window.
PRESCRIBE NEW DRUG BUTTON changes the screen to the find a drug search window.
![]() FIND A NEW MEDICATION at the top of the screen is a search box that will display a drop-down of medications based on the drug name.
FIND A NEW MEDICATION at the top of the screen is a search box that will display a drop-down of medications based on the drug name.
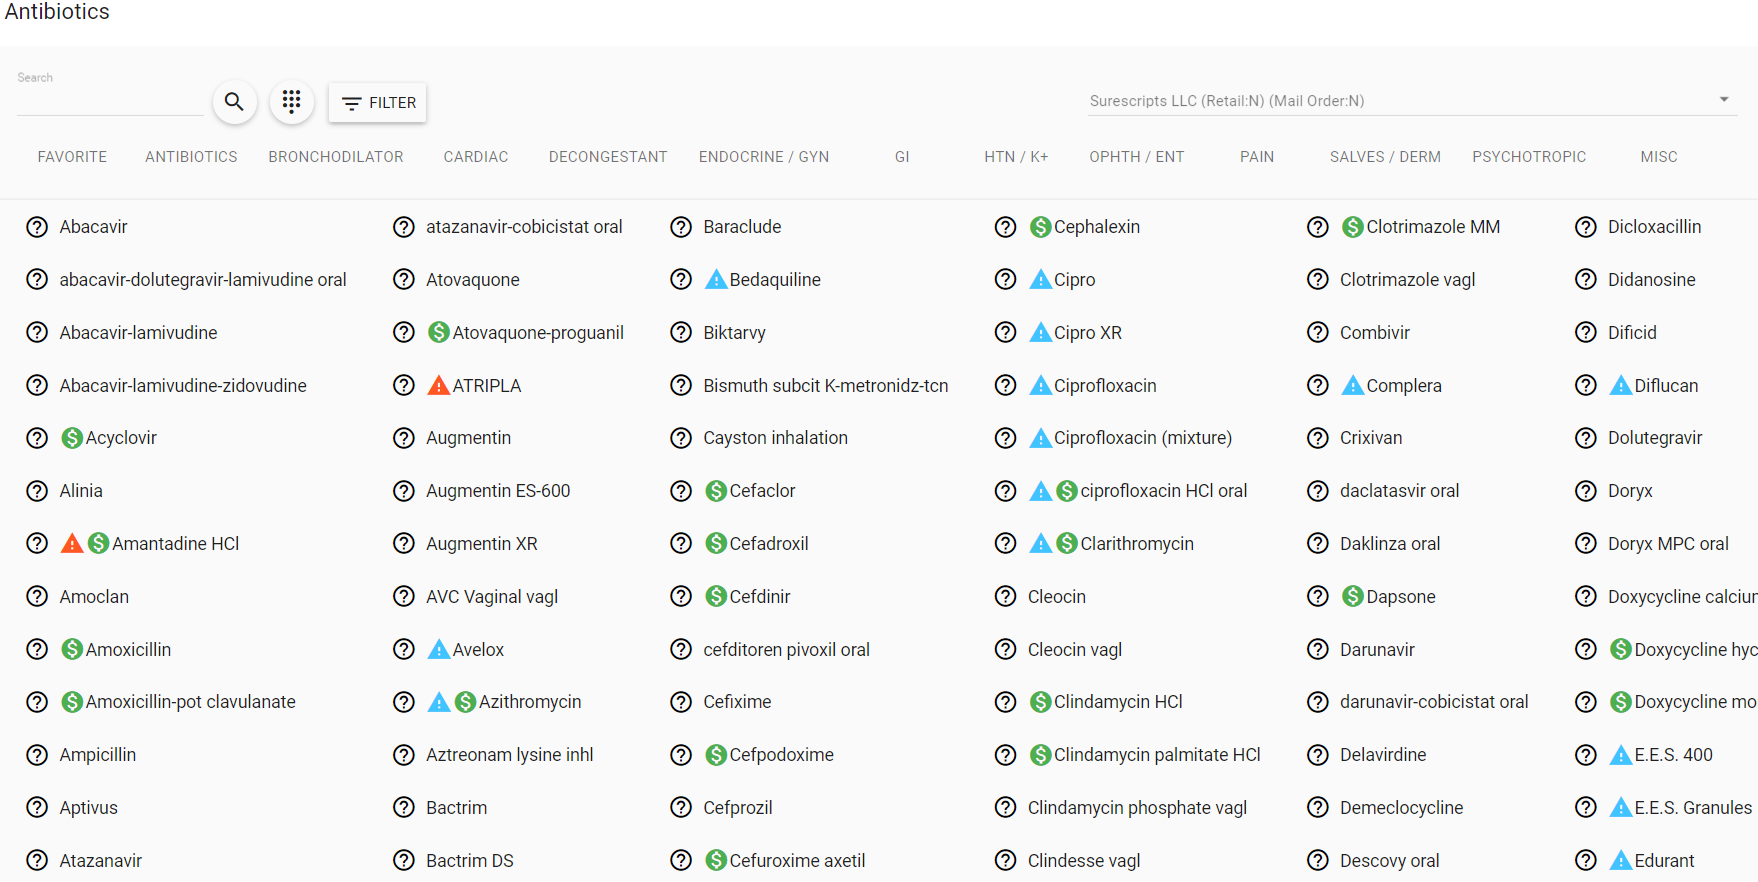
TIP: The  icons have drug filtering and drug group viewing capabilities.
12. SELECTING A MEDICATION TO PRESCRIBE
![]() Select a patient.
Select a patient.
![]() Click the
Click the  button and then search for the drug you would like to prescribe.
![]() Click on the drug name and a slider will appear to select the desired format (slider pictured below).
Click on the drug name and a slider will appear to select the desired format (slider pictured below).
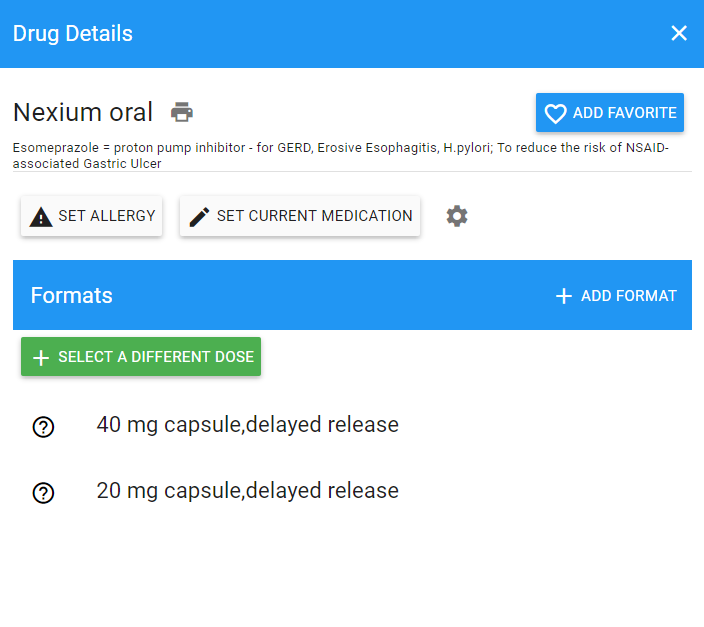
![]() Once a format (strength) is selected, you will be able to select the specific number and SIG for the prescription from a pre-programmed list.
Once a format (strength) is selected, you will be able to select the specific number and SIG for the prescription from a pre-programmed list.

Note: If you would like to modify the drug format, you can do so at the Prescription Preview window which will appear after a format is selected. ANY FIELDS CAN BE MODIFIED.
13. PRESCRIPTION PREVIEW SCREEN
Modifications can be made to a prescription prior to printing or sending to a pharmacy. This is done at the Prescription Preview screen. All fields can be modified and the send method for the medication can be chosen from this screen.
![]() Select a patient.
Select a patient.
![]() Find the medication you would like to prescribe.
Find the medication you would like to prescribe.
![]() Select the medication and the format.
Select the medication and the format.
![]() The Prescription Preview window opens, the format selected will be expressed in the fields. You can make any modifications necessary at this point: change the quantity, set refill amount, add a comment, etc.).
The Prescription Preview window opens, the format selected will be expressed in the fields. You can make any modifications necessary at this point: change the quantity, set refill amount, add a comment, etc.).
![]() When ready to produce the prescription, click one:
When ready to produce the prescription, click one:

(NOTE: Add Diagnosis fields and Formulary compliance and class alternatives are shown on right)

You can send to pharmacy, Send to In-house pharmacy, queue to provider for sending later, save only and print prescriptions.
14. SENDING A PRESCRIPTION ELECTRONICALLY TO A PHARMACY
![]() After selecting a patient and then a medication, you can send a prescription electronically to the pharmacy location indicated on the prescription preview window and then clicking the
After selecting a patient and then a medication, you can send a prescription electronically to the pharmacy location indicated on the prescription preview window and then clicking the  button on the Prescription Preview window:
![]() Click the Pharmacy drop down to
Click the Pharmacy drop down to ![]() to view other preferred patient pharmacies.
to view other preferred patient pharmacies.
![]() If you want to select or search for a new Pharmacy to send a prescription to, click the
If you want to select or search for a new Pharmacy to send a prescription to, click the ![]() to select or search for another pharmacy. There are three different tabs of this screen that will show:
to select or search for another pharmacy. There are three different tabs of this screen that will show:
- Patient Preferred pharmacies
- Frequently Used Pharmacies
- Pharmacy Search (at top) – allows you to search for a pharmacy

15. CREATE A FAVORITE MEDICATION LIST
ScriptSure allows you to select a medication and add it to a Favorite List so that it can be located easily in the future.
Add a Medication to Favorite Medication list:
![]() Select a patient.
Select a patient.
![]() Find the medication you would like to add to your favorite list.
Find the medication you would like to add to your favorite list.
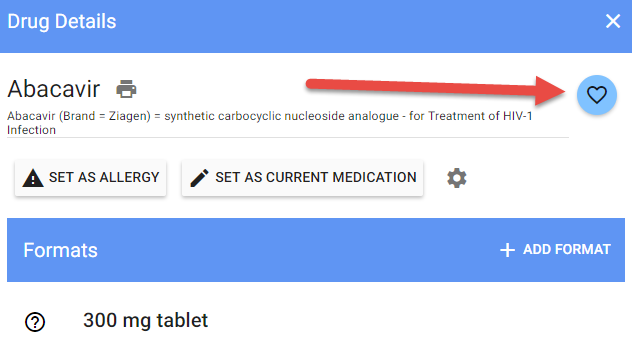
![]() Select the medication by clicking on it and when the formats window slides open, click the
Select the medication by clicking on it and when the formats window slides open, click the ![]() to add to your favorites list. When it is orange
to add to your favorites list. When it is orange ![]() , the medication is on the Favorites list.
, the medication is on the Favorites list.
16. STORING A NEW FORMAT
ScriptSure allows you to customize the formats attached to any medication for easy selection in the future.
![]() Select a Patient.
Select a Patient.
![]() Find the medication you would like to prescribe.
Find the medication you would like to prescribe.
![]() Click on the medication name and then click on Add Format:
Click on the medication name and then click on Add Format:

![]() Select the strength to create and store a format for and the prescription preview window will open.
Select the strength to create and store a format for and the prescription preview window will open.
![]() Next, enter any required information and customize the SIG details for the medication and click the save format button:
Next, enter any required information and customize the SIG details for the medication and click the save format button: ![]() .
.

When you click Save, you will be prompted to enter a title for the format – the format will then be available anytime you select the medication it was entered for.

Was this article helpful?
That’s Great!
Thank you for your feedback
Sorry! We couldn't be helpful
Thank you for your feedback
Feedback sent
We appreciate your effort and will try to fix the article