Return to top
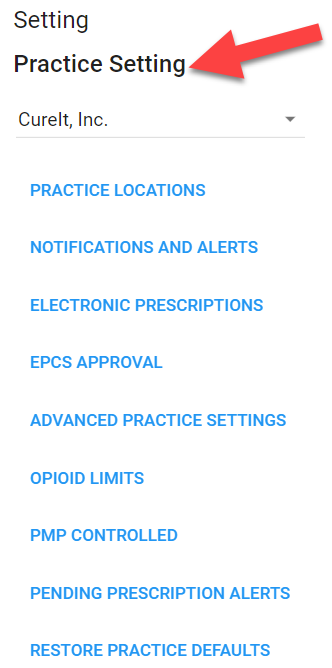
Practice Settings
Only administrators have access to view and edit the practice settings. Changes to these settings will set the default for all users within the practice. (Individual users will still be able to change their user specific settings.) TABLE OF CONTENTS
- Practice Locations
- Notifications and Alerts
- Electronic Prescriptions
- EPCS Approval
- Advanced Practice Settings
- Opioid Limits
- PMP Controlled
- Pending Prescription Alerts
- Restore Practice Defaults
Navigate to Practice Settings
- Login to ScriptSure: www.scriptsure.com.
- Click your name in the top righthand corner.

- Select "Settings"
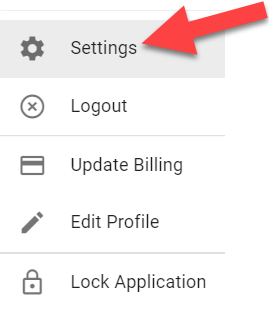
- Navigate to "Practice Setting".
Practice Locations
Here you can add new practices or edit your existing practices.

To Add a Practice:
1. First, click "ADD PRACTICE".

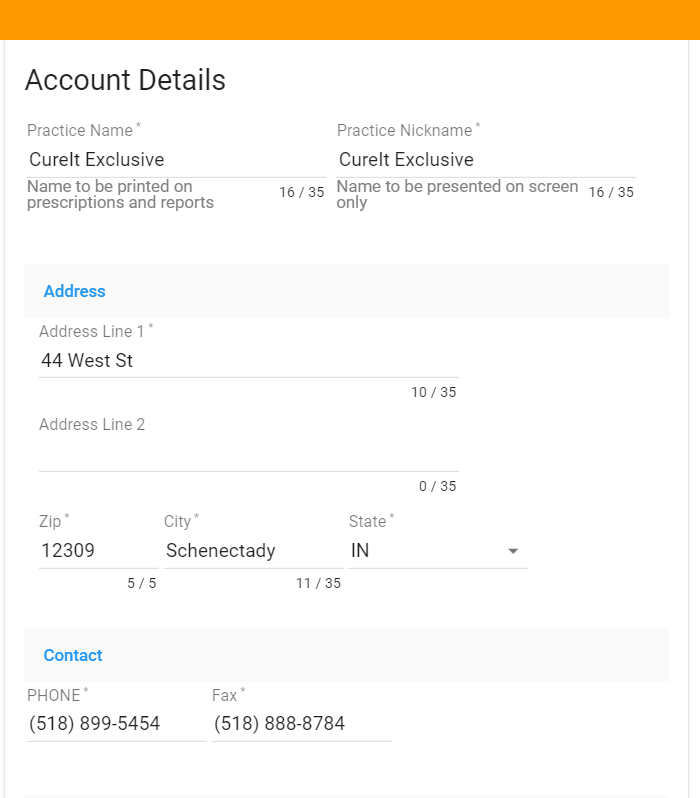
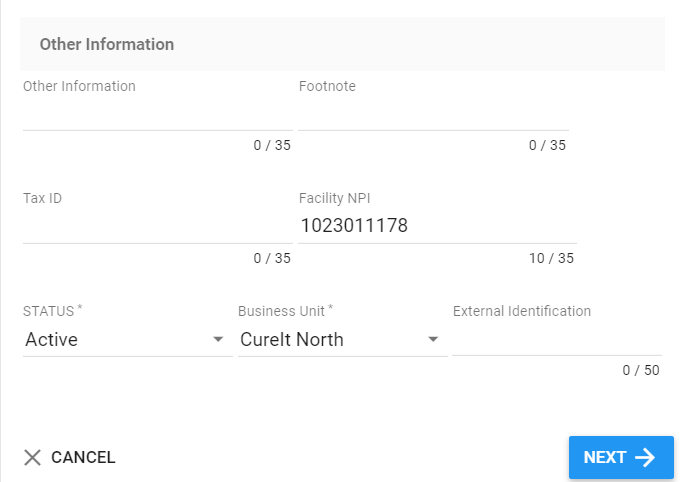
2. Enter the Account Details and then click "Next". Information entered here will be included on the cover sheet when prescriptions are sent to the pharmacy. (The fields with an asterisk (*) are required fields. The other fields are optional.)


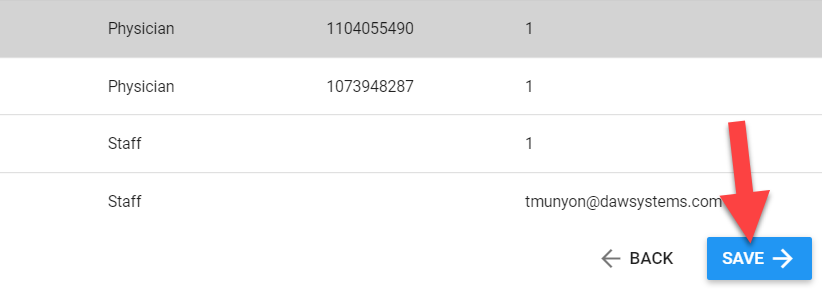
3. Add Users: The next screen allows you to add users to the new practice. First, click "Add User".
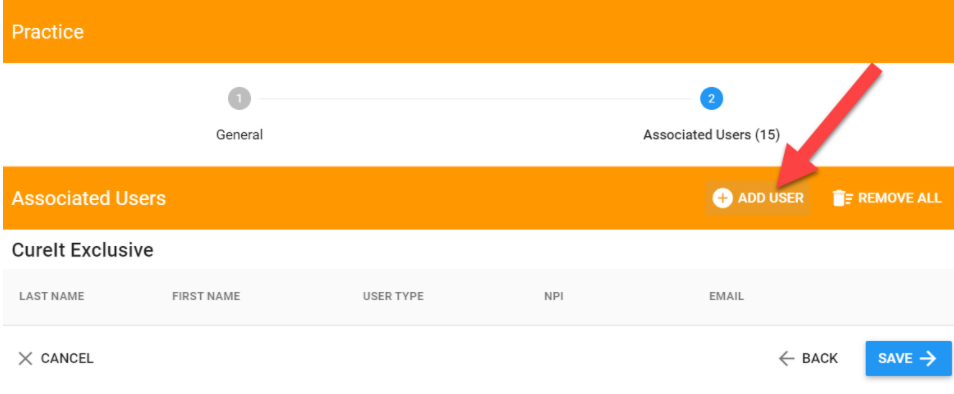
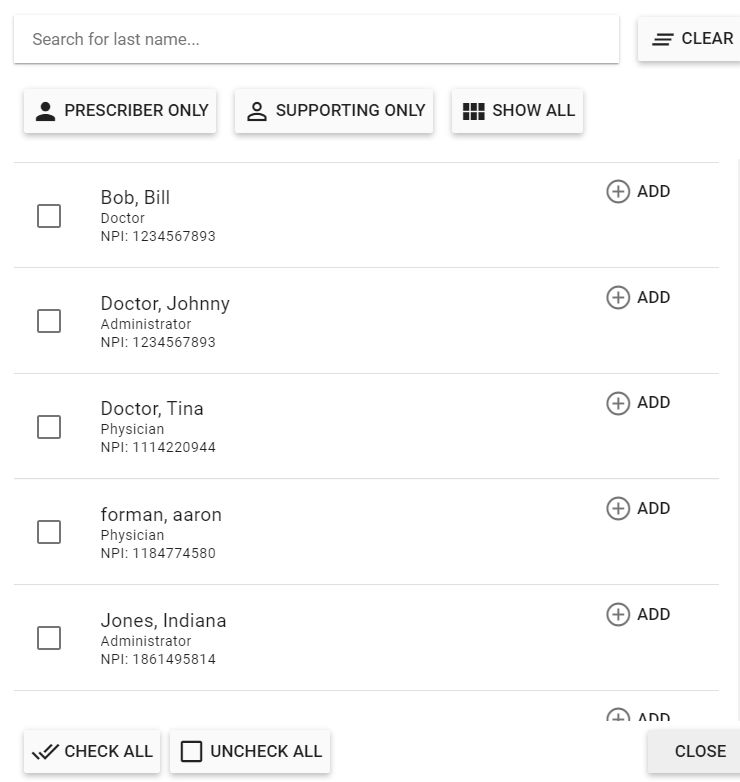
The following box will pop up to allow you to select users. You can select users one by one or by clicking "Check All", and then click "Add Checked".
To Edit Practice:
- Click "Edit"

- Edit the fields as necessary and then click "Next".
- Add users if needed and then click "Save".
Notifications and Alerts
To turn on an alert, slide the marker to the right until it turns red. (For more details, click here.)

Electronic Prescriptions
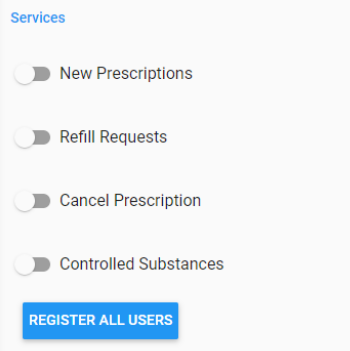
Services: This tab can be used when many users need to be registered at once. Move the marker to the right to turn on the service and then click "Register All Users".
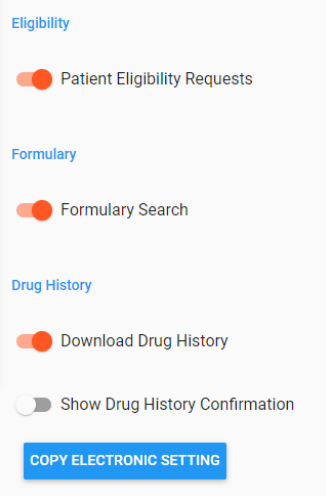
Eligibility
- Slide the marker to the right if you would like to access patient insurance eligibility.
Formulary
- Slide the marker to the right to enable formulary search. The formulary search will include formulary levels for medications like the example below.

Drug History:
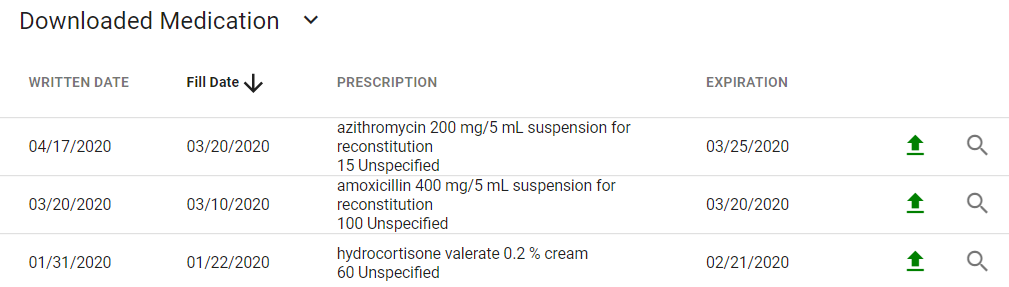
- Download Drug History: Slide the marker to the right to download drug history like the example below. Downloaded medications are pulled from scripts that have been billed to the patient's insurance. (This option is not available to all plans.)
- Show Drug History Confirmation: Slide the marker to the right to display history confirmation. When enabled, a history confirmation box (like the example below) will pop up each time you select a new patient; it will include a summary of the patient's insurance status.

- Copy Electronic Setting: This button can be used to copy the settings to all users within the practice.
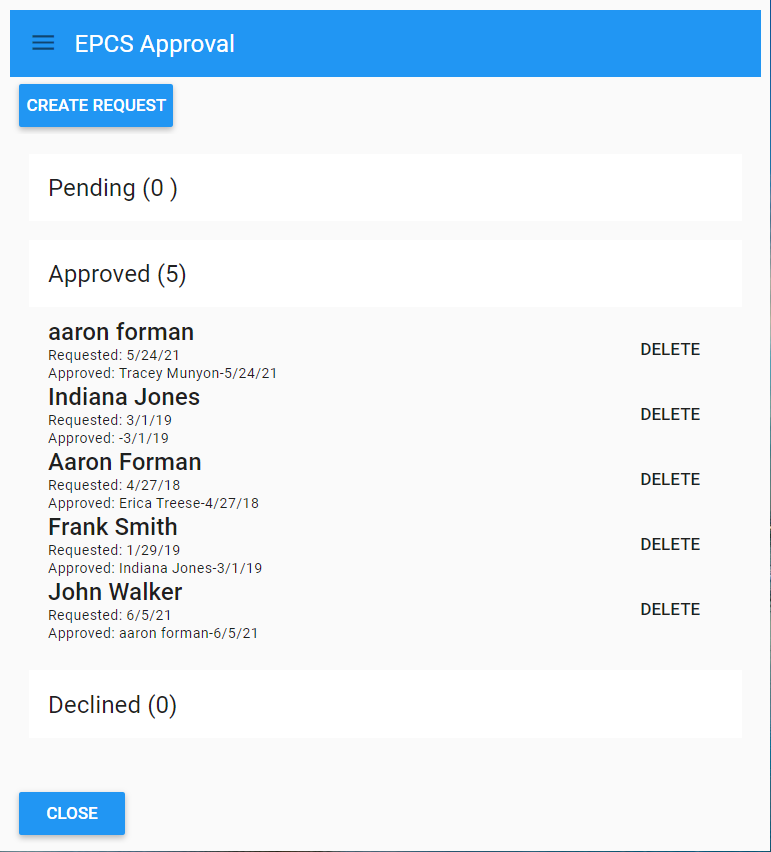
EPCS Approval
- This is a list of all provider EPCS requests. It shows pending, approved, and declined.
Advanced Practice Settings
- Slide the markers to the right to enable the setting.
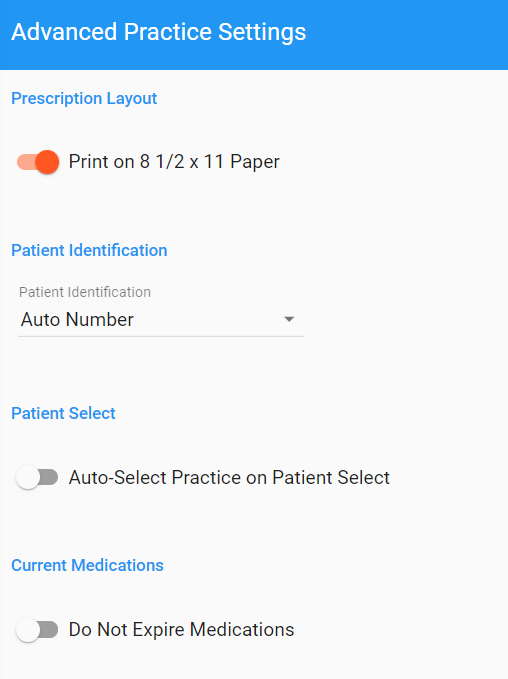 | Prescription Layout: Print on 8 1/2 x 11 Paper
Patient Identification:
Patient Select: Auto-Select Practice on Patient Select Current Medications: Do Not Expire Medications
|
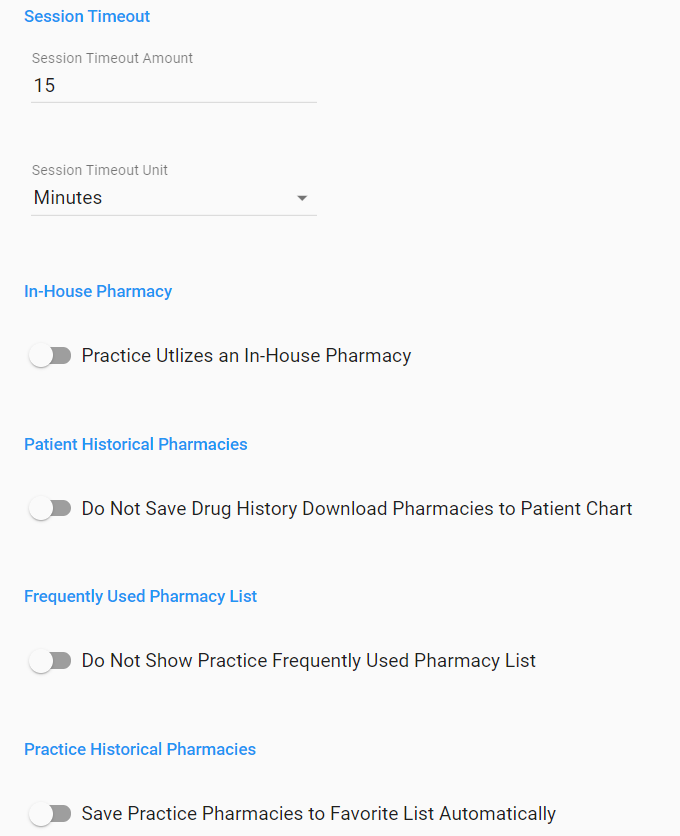  | Session Timeout: This will determine how long you can be inactive before the system logs you out.
In-House Pharmacy: Practice Utilizes an In-House Pharmacy (For more details, click here.) Patient Historical Pharmacies Do Not Save Drug History Download Pharmacies to Patient Chart
Frequently Used Pharmacy List Do Not Show Practice Frequently Used Pharmacy List Practice Historical Pharmacies Save Practice Pharmacies to Favorite List Automatically Delivered Formats Remove Delivered Formats from Drop Down
Chronic Selection Remove Chronic Selection from Prescription |

Opioid Limits
- Slide the marker to the right to turn on the Opioid Limit settings.

PMP Controlled
- This tab is set internally by ScriptSure.

Pending Prescription Alerts
The steps below detail how a practice/organization can setup text and email alerts to inform of pending prescriptions in a Provider’s Queue that need attention. A provider is anyone with a DEA/NPI number and authorized to send prescriptions in ScriptSure.
Administrators
Only administrators for an account can turn on SMS text and email alerts functionality for pending prescriptions for a practice; this is a Global Setting. After Enabling Alerts, Provider’s can receive alerts if their profile is setup correctly with an email and cell phone number.
An administrator can login, go the Settings>Practice Settings>Pending Prescription Alerts to enable and set the appropriate options for prescribing users.
SETTINGS AND HOW TO ENABLE ALERTS FOR AN ACCOUNT
1. In order for Providers to receive pending prescription alerts ensure the following is completed.

2. When the Settings Window opens, click Pending Prescription Alerts under the Practice Settings:

3. The administrator must first Enable the alert functionality. This is enabled when the slider is slid to the right and orange:

4. In the Screenshot below, set the other options for allowing users to receive SMS text messages and/or allowing for Email Messages. When alerts are turned on at the practice level it means each Provider will have the option of receiving an SMS text and/or email alert. Note: Providers can under their own settings turn these on or off for themselves.
Example: If only SMS text messages are turned on by the administrator, then the Providers will ONLY be able to receive SMS text alerts.
5. View and select or edit the appropriate options as desired:
- Alert Sending Enabled: This allows for an administrator to activate the sending of alerts for the practice/organization.
- Allow SMS Text Messages: Enabling this setting (slide right to enable) allows for the application to send a SMS text alert to a provider’s SMS text capable cell phone added to their user profile. Standard text message rates apply from the Providers cell phone provider.
- Allow Email Messages: Enabling this setting (slide right to enable) allows for the application to send an email alerts to the provider login email address in the user profile.
- Default message: this is the message that users will receive to their email or text to inform them that a prescription is pending their approval. It is recommended to use the default message presented, but you can modify and enter up to 150 characters.
- Alert Interval: This refers to the amount of time for a follow-up message to be sent to a prescriber. Users can set from an interval of 30 minutes to 240 minutes. For example, if the setting interval is set to 30 minutes, and a pending prescription lands in a provider’s queue at 1:00pm, the provider will receive a SMS text at 1pm and another at 1:30pm, 2:00pm (every 30 minutes until the prescription is addressed and removed from the Providers queue).
- Do Not Disturb: Allows an administrator to set a global do not disturb Start and End time period for all Providers. During the do not disturb period, Providers will not receive SMS text or email messages regarding the pending prescription alerts.

6. Click Save and the Close in the bottom left to store the changes:

Restore Practice Defaults
- Click this option only if you would like to reset all Practice Settings to the default settings.
Was this article helpful?
That’s Great!
Thank you for your feedback
Sorry! We couldn't be helpful
Thank you for your feedback
Feedback sent
We appreciate your effort and will try to fix the article